Inserting a desk in Microsoft Phrase is easy, however the default gained’t at all times work precisely the way you need it to. For example, the default alignment is offset from the left margin. What in order for you the desk centered or flush to the appropriate margin? The excellent news is realigning a desk is simple.
SEE: There are a number of methods to create an em sprint in Microsoft Phrase.
The default desk aligns left
While you insert a desk or convert textual content right into a desk, Phrase positions it between the left and proper margins. You possibly can simply change this. There are a number of methods to align a desk throughout the horizontal aircraft between the left and proper margins.
The very first thing you would possibly wish to change is the width. There’s not sufficient textual content to fill the cells and it might look odd. As well as, the readability is low. Your eyes strive to soak up all the desk without delay as a substitute of studying the content material. Thankfully, altering the width is simple.
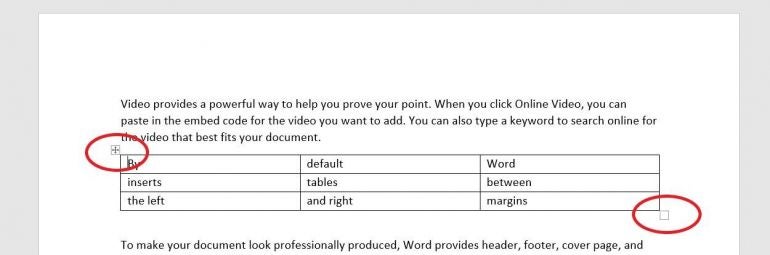
- Click on the desk to pick out it. Doing so will show two handles: one within the top-left nook and one within the bottom-right nook.
- Hover the mouse over the deal with on the bottom-right nook and your mouse will flip right into a double-arrow.
- Merely drag up and to the left to scale back the width of the desk and the width of every cell.
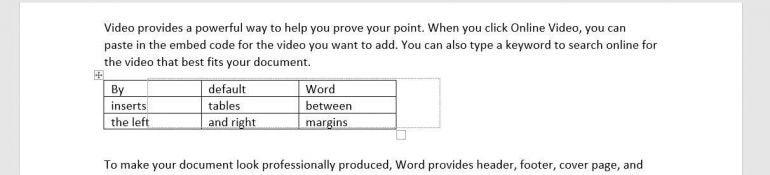
The resized desk is a greater match, and you possibly can simply cease right here when you don’t need it aligned otherwise.
SEE: Learn to create tables utilizing HTML. (TechRepublic)
How one can align desk margins in Phrase
When you have got a desk that doesn’t unfold from the left to the appropriate margin, you would possibly wish to align it. You possibly can apply particular alignments or indent the desk.
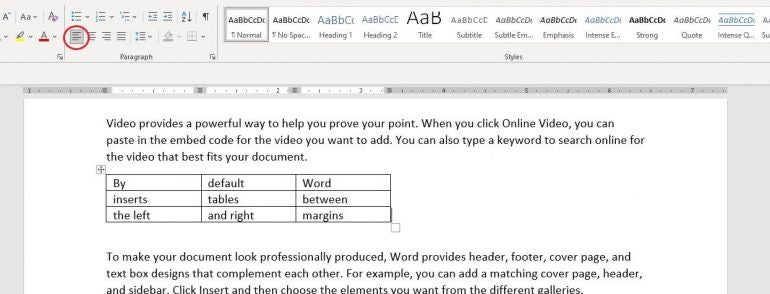
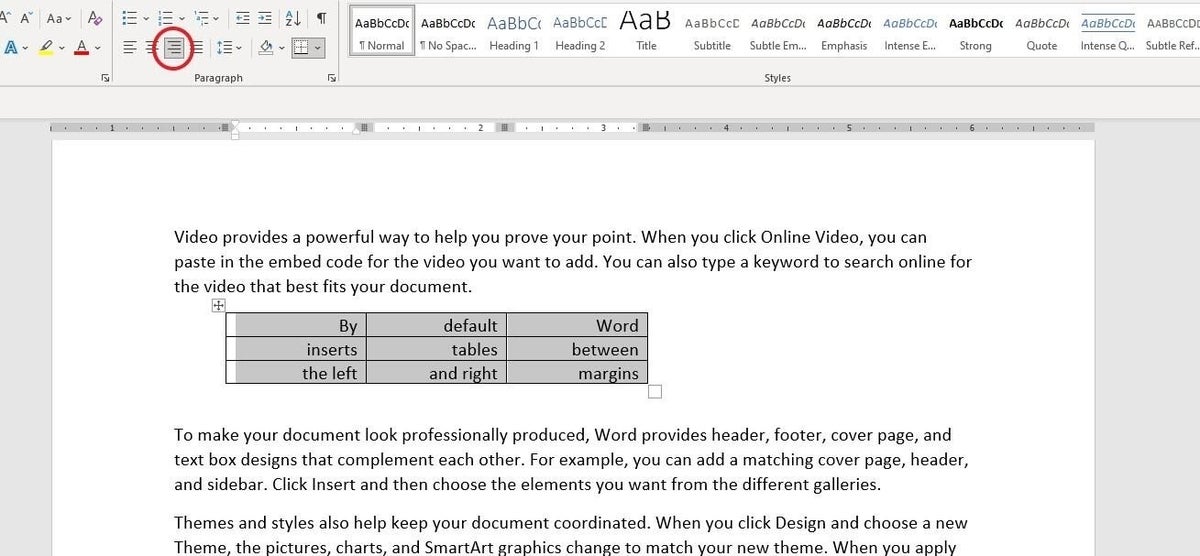
You have got three alignments: left, heart, and proper. The default desk is aligned to the left margin. You possibly can simply examine by choosing all the desk (not a cell) and viewing the alignment choices within the Paragraph group on the House tab. The picture above exhibits the Align Left choice chosen. To align the desk, choose the desk and click on one of many different choices: Middle or Left Align. Utilizing these three choices you possibly can rapidly and simply align your desk to the left, heart, or proper.
It’s also possible to use the Desk Properties choice to align a desk. To entry these choices, right-click anyplace within the desk and select Desk Properties from the ensuing submenu. Within the Desk tab, select an choice from the Alignment part, and click on OK. There are lots of property choices, however we’re involved with solely these within the Alignment part. You would possibly wish to return later and overview all the opposite choices.
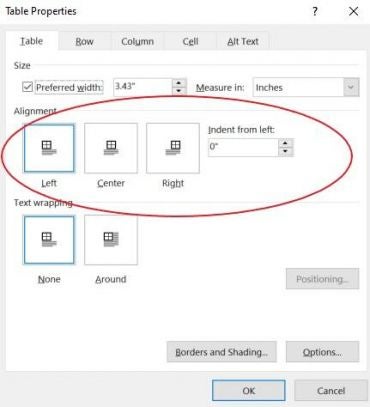
The ultimate alignment choice is Indent From Left. This lets you simply indent the desk from the left margin. Indent From Left is the choice to make use of if it is advisable to be exact. You are able to do the identical factor by dragging the desk and utilizing the ruler to snap the desk into place. Or use the Enhance Indent choice within the Paragraph group to maneuver the desk a half-inch at a time.
Aligning the content material inside every cell is simply as straightforward utilizing the Desk Properties. On the Desk tab, click on the Choices button to open the Desk Choices.
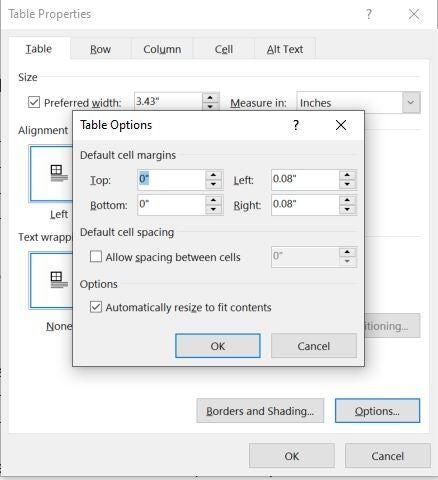
The Default Cell Margins part permits you to change the scale of all 4 margins. By default, the Robotically Resize To Match Contents choice is chosen. To heart or right-align content material within the cell, use the alignment choices within the Paragraph group. Nonetheless, you need to choose the textual content reasonably than all the desk; in any other case, clicking an choice will align the desk, not the content material throughout the cells.
SEE: Home windows 10: Lists of vocal instructions for speech recognition and dictation (free PDF) (TechRepublic)
How one can align tables in Phrase On-line
Aligning is a bit completely different in Phrase On-line, however remains to be easy. With the desk chosen, right-click the desk and select Paragraph Choices. Use the Alignment dropdown within the Normal part. Utilizing the Align choices on the menu will align the textual content throughout the cells reasonably than the desk. Thus far, all the things we’ve finished has been clear-cut, however you may need seen the textual content is positioned as a paragraph. The textual content doesn’t movement across the desk.
How one can wrap textual content round tables
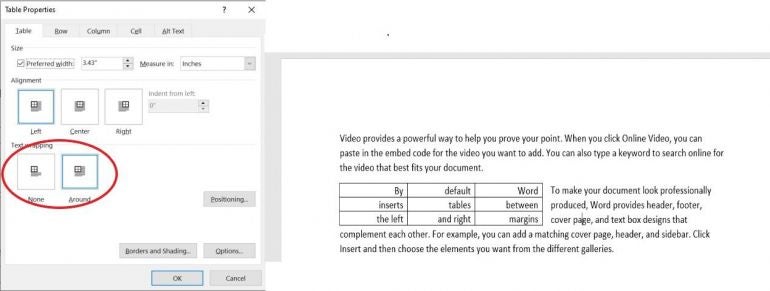
In order for you textual content to wrap across the desk, you need to change one other default choice. Return to the Desk Properties dialog. Beneath the alignment choices, you’ll see the textual content wrapping choices. The default is not any wrapping. Merely click on the Round choice and click on OK. This selection pulls up the textual content under and wraps it across the desk. I clicked Backspace twice to drag the textual content as much as align it with the highest of the desk. Pulling the textual content up this manner might trigger the paragraph to undertake a few of the desk’s properties. Merely click on Regular to repair it.
Aligning Phrase tables as an entire is a straightforward process, and there are a number of methods to get the alignment you need.
Megan Crouse up to date this text.